Opens a GitHub issue for the failure, next to the code that caused it.
notify.github
The piece
Open a GitHub issue for the failure. The device, the failing step and the run's details go in the body — GitHub's API can't take file attachments.
Reach for it when
The repo is where the work happens and a separate tracker would be a second place to forget.
A push trigger, so the issue lands beside the commit that broke it.
Create GitHub Issue
Idle
In the bag
Every setting this block has. A field marked only when appears once you have chosen the mode above it — those are alternatives to each other, not extra things to fill in.
RepositoryRequired
starts at —
owner/name, e.g. acme/mobile-app.
Access tokenRequired
write-only
A fine-grained PAT with Issues: read & write on this repository only — not a classic token with repo scope.
starts at Automated run failed on {{ $Device Manual Trigger.json.device }}
Body
starts at Failed during an automated run on {{ $Device Info.json.model }} ({{ $Device Info.json.os }}).
Labels
starts at bug,automated
Comma-separated. Labels that don't exist yet are created.
Group into one issue
starts at on
Find the open issue already filed by this step and comment on it rather than opening another. Leave this on: six devices failing the same check should be one bug, not six.
Only if a step has failed
starts at on
Skip the message when every step before this one passed. This is what a nightly regression wants: silence is the good outcome.
Get your keys
What to click on the other service's side to get the values this block asks for. Paste each one in, then use “Save as credential” so it is encrypted and kept out of the workflow.
You need: Write access to the repository. For an organisation's repo, the organisation must allow fine-grained tokens, and may have to approve yours.
1On GitHub: your avatar → “Settings” → “Developer settings” → “Personal access tokens” → “Fine-grained tokens” → “Generate new token” (or use the link).
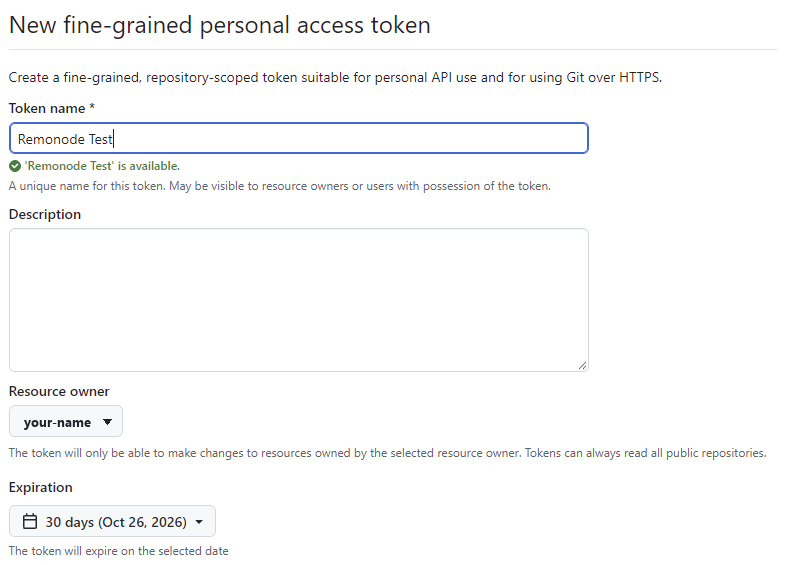
2Name it and pick an expiration.
3Set “Resource owner” to whoever owns the repository — your account, or the organisation.
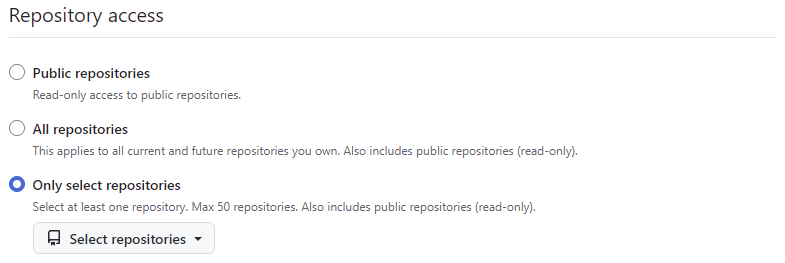
4Under “Repository access”, choose “Only select repositories” and pick the one repository.
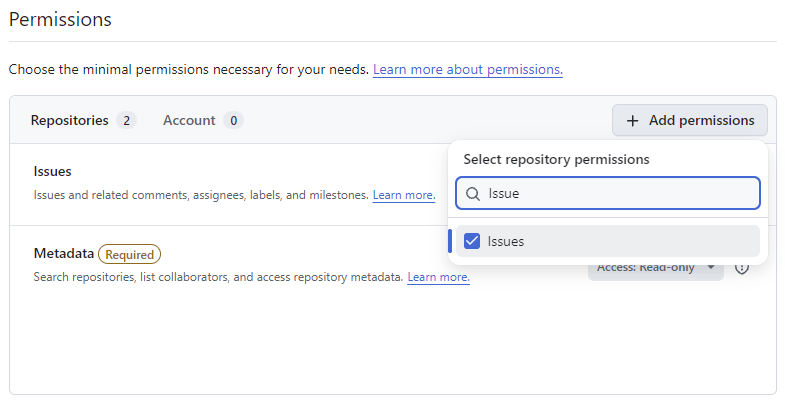
5Under “Permissions”, click “Add permissions”, search for Issues and tick it. (GitHub adds “Metadata: Read-only” by itself.)
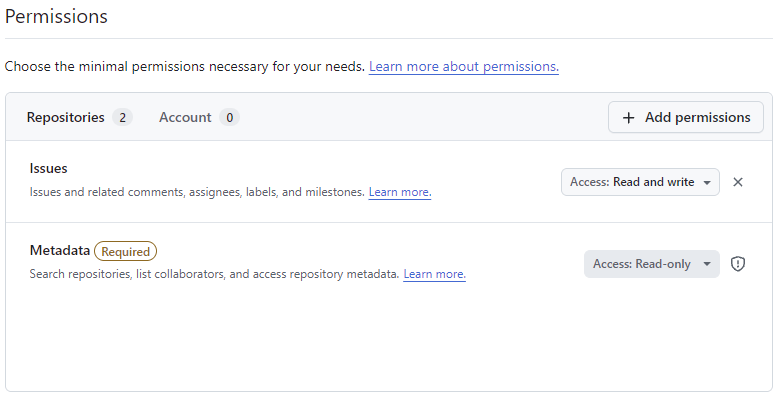
6Issues arrives as “Access: Read-only” — open that dropdown and change it to “Read and write”. Read-only cannot open an issue.
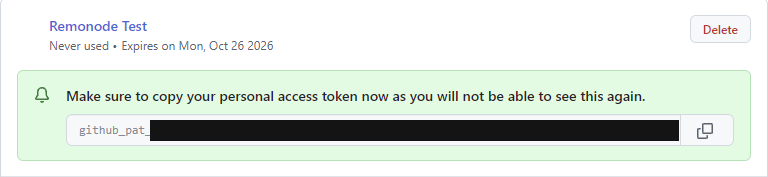
7Click “Generate token”, check the summary says Issues: Read and write, click “Generate token” again, then copy the token — it is shown once — into Access token.
Permissions
IssuesRead and write
MetadataRead-only, added automatically
Looks like
github_pat_11ABCDEFG0…(about 90 characters)
Fig. 1Token name, resource owner and expirationFig. 2Repository access → Only select repositories → Select repositoriesFig. 3Add permissions → Issues (then set its access to Read and write)Fig. 4Issues at “Access: Read and write” — Read-only cannot open an issueFig. 5The token, shown once
⚠If the organisation requires approval, the token is “pending” and every call fails with 403 until an owner approves it under the organisation's Settings → Personal access tokens.
⚠A 403 “Resource not accessible by personal access token” means Issues was left at Read-only. You do not need a new token: open it under Fine-grained tokens, change the permission, and save.
⚠A classic token (ghp_…) with repo scope works too, but it can write to every repository you can — a leaked one is a much bigger problem.
Build it
1
Point it at the repository
A fine-grained PAT with Issues: read & write on this repository only — not a classic token with repo scope, which can do everything to everything.
Create GitHub IssueSettings
Repositoryowner/name · Required
acme/mobile-app
Access tokenFine-grained PAT
write-only
2
Put the evidence in the body
GitHub's issues API has no upload endpoint — an image can only be embedded from a URL that is already hosted somewhere. So there are no attachment switches here, and the device, the failing step and the run's details go in the text instead.
acme/mobile-appGitHub
Automated run failed on Pixel 8
Failed during an automated run on Pixel 8 (Android 14).
Step: Assert / Verify — “Order confirmed” not found.
labels: bug, automated
3
Leave the grouping on
Same fingerprint behaviour as the Jira node: find the open issue this step already filed and comment on it rather than opening another.
Create GitHub IssueSettings
LabelsMissing labels are created
bug,automated
Group into one issue
on
Only if a step has failedOn by default here
on
What comes out
The issue number it opened or commented on.
Watch out
⚠No attachments — said here rather than offered as a switch that would be quietly dropped. Post the screenshot to a chat channel as well if somebody needs to see it.
⚠Labels that do not exist yet are created, which is convenient and means a typo becomes a new label.
⚠Grouping here rides GitHub’s issue search, which indexes a new issue a little after it is created — two failures seconds apart can both open one. The marker it looks for sits at the foot of the body (remonode:fp:…); deleting it starts a new group.
⚠Use “Save as credential” rather than typing it in: a typed secret is stored with the workflow, so publishing or sharing the workflow shares the secret too.